Item Charger: Difference between revisions
Wiki Port 2 (talk | contribs) No edit summary |
Bwazedilla (talk | contribs) No edit summary |
||
| Line 1: | Line 1: | ||
{{Infobox multiblock | {{Infobox multiblock | ||
| name = Item charger | | name = Item charger | ||
| | | image3 = <gallery mode=slideshow> | ||
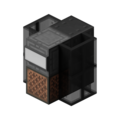
Item_charger.png|Normal | |||
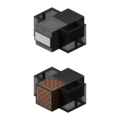
Item_charger_1.png|Expanded | |||
</gallery> | |||
| caption2 = A tier 1 item charger | | caption2 = A tier 1 item charger | ||
| powerstorage = 100000 / 200000 / 300000 | | powerstorage = 100000 / 200000 / 300000 | ||
Revision as of 06:34, 20 January 2025
| Item charger | |
| Properties | |
|---|---|
| Maximum power storage | 100000 / 200000 / 300000 |
| Power transfer per second | 1000 / 2000 / 3000 |
| Tiers | Tier 1: Iron Block Tier 2: Gold Block Tier 3: Diamond Block |
| Resource Requirements | |
Item chargers consume power to recharge player gear and other items.
Item chargers can be detected with the sign text [charger].
Item chargers input power via its note block.
A Prismarine Crystal must be placed in the top slot of the furnace for the item charger to function. Item to recharge is placed in the bottom/fuel slot.
This multiblock requires power to function. Follow the Power Guide for more information.
A minimum of 1000 / 2000 / 3000 power in the charger is required to transfer power to an item.

