S1ice's General Guide to Wiring
WIP - Migrating from old wiki
Contains some helpful concepts and useful practices for wiring!
This document is written with the expectations that you, the reader, already have a basic understanding of the mechanics detailed in the Power Guide.
For any suggestions, comments, or requests, send a message to s1ice on Discord, or send a message in the `#creations` post that this was sent in! I’ll be more than happy to respond to any questions you might have.
Important Note:[edit | edit source]
A recent technical change allows for Lapis Blocks to be used for merging wires, but they behave inversely to Redstone Blocks, meaning they only output power to sponges. For the purposes of this guide, I'll be demonstrating merging with Redstone Blocks. Multiblocks that use Redstone Blocks cannot use Lapis Blocks in their construction.
Wire Merging[edit | edit source]
This concept is crucial for managing efficient circuits, and should be present in any wiring system, especially for Solar Panel grids and large power plants, as they’ve been implemented as the main source of power generation & storage for a while.
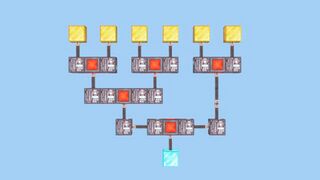
With that idea in mind, it becomes easy to visualize combinations for larger numbers of inputs, like this one here.
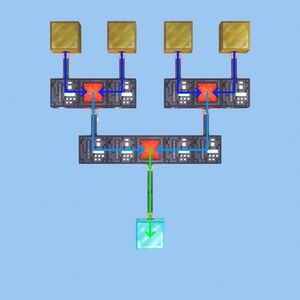
Gold block = Power Source (crafting table)
Diamond block = Destination (note block)
This is an example of how 4 power sources can merge into 1 power line.
And the largest benefit of this system is that it’s very simple to replicate, as the pattern builds on itself.
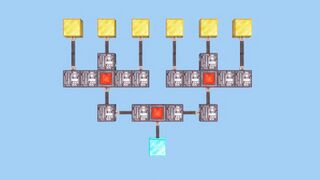
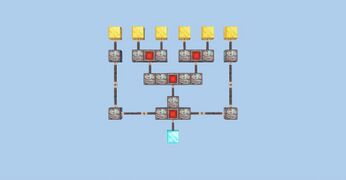
The images below are all good examples of wire merging for 6 outputs. (They all produce the same power/sec)
All of these exist using the same idea as before - only allow the power to exit a merge through 1 point. (I’m personally a fan of the second one)
Common Mistake: Branch Splitting[edit | edit source]
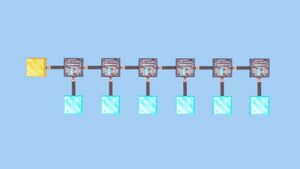
This is a common mistake that I’ve seen happen (and used to do myself) in wiring systems many times.
The issue with this setup is that every time the power goes through a sponge, power has a 50/50 chance either go to the side or straight ahead.
Meaning that every sponge is half as likely to transfer power as the previous sponge.
Let’s look at the numbers here:
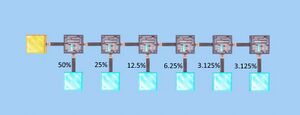
The last input is as likely to get the original input’s value divided by two, 4 times.
This is why merging correctly is so important, because otherwise each output receives increasingly less power than the previous one, which can lead to a large disparity between rows of machines, with some having no power and some being full on power.
Luckily though, we don't have to worry about this problem with inputting power. Power banks aren't using any of it, so it doesn't matter how much or little each bank has.
Power-of-2 Merging & Splitting[edit | edit source]
Many points —> 1 point (Merging)[edit | edit source]
Power-of-2 merges are, by far, the easiest and most consistent types of merges to build, because it works perfectly with the 2 wire → 1 wire branch system.
This includes systems with 2, 4, 8, 16, and even 32-block lines of outputs.
Gold Block: POWER SOURCE
Diamond Block: DESTINATION
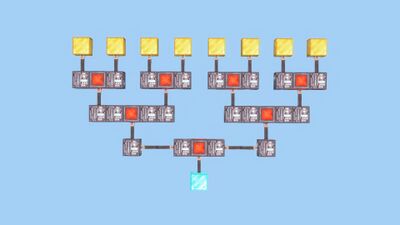
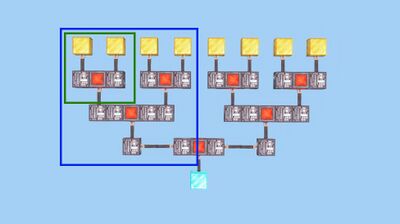
As you can see, an 8-input merge is simply two 4-input merges. A 4-input merge is simply two 2-input merges.
Meaning any power-of-2 merge is just two of the previous merges… merged together.
This allows for much more uniform circuitry throughout your builds, which will make working with them in the future much more manageable.
1 point —> Many points (Splitting)[edit | edit source]
Splitting from one power source to many inputs is a very common practice for systems with large amounts of multiblocks, like printer or furnace arrays. Both merging and splitting very heavily play a role in HE’s power system.
The reason they’re so important is because ***they evenly distribute power to all of their outputs.*** This is, by far, the most important factor about wiring that's been overlooked throughout all the wiring projects I've worked on.
Below shows how to evenly split 1 power source into multiple inputs, using similar methods as above.

- (The Redstone Blocks here are only to show where the power splits - I suggest that you replace those with sponges, as they work just the same, and are cheaper)*
And as stated earlier, this system builds on itself.
On the far left, you can see the setup for a system with 2 inputs. And a design that splits into 4 outputs is just a combination of two 2-output splits.
Conveniently, this setup is about half as long as merging setups, simply due to the way that sponges and Redstone Blocks function.
Stacking[edit | edit source]
Realistically, you shouldn’t ever need to go past 16 inputs in a row, because there’s a third dimension we can work with.
Here, we have 4 stacks of 16 inputs.
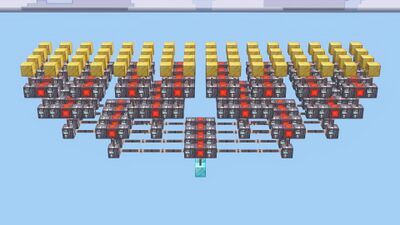
And connecting all of these stacks into one line is done with a simple 4 output merge.
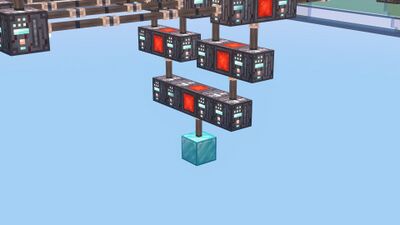
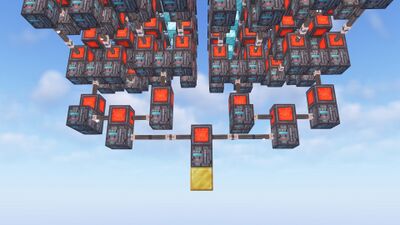
The image below is an array of 64 Power Furnaces that I designed.

It looks a little complex, but it’s nothing more than 8 rows of 8 merges.
Directionality[edit | edit source]
Directionality is a property that is unique to Redstone and Lapis Blocks, where they prefer to output power in the same direction that they received it.
For this example I'll be using Redstone Blocks.
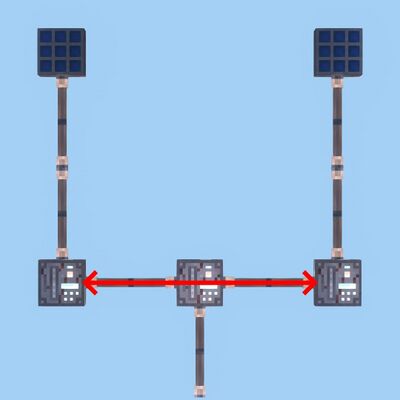
Below is an example setup to demonstrate the effects of directionality.
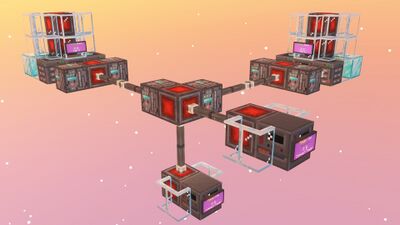
There are two inputs - one coming in from the back, and one coming in from the right.
Ideally, you would want to merge the outputs of the power banks and split it evenly to the two power cells.
But here’s what happens if we give power to the bank on the left:
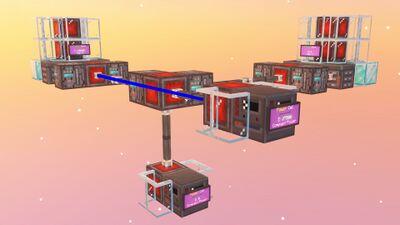
As you can see, the bottom power cell receives nothing.
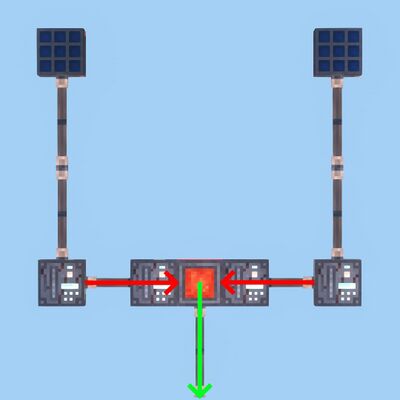
And if we only power the bank on the right:
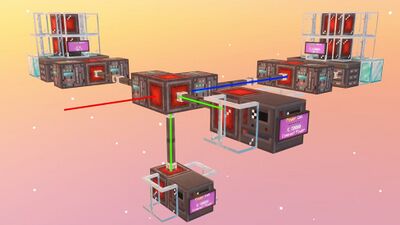
We see that both of the power cells were filled.
The reason it powered both, as you might have been able to observe, is that the path from the bank to either power cell was not a straight line.
The Redstone Block was not able to send the power to the side opposite its input, so it split evenly to the other directions.
Situations like this are really important to be aware of in almost any wiring project you do that have multiple input/output locations.
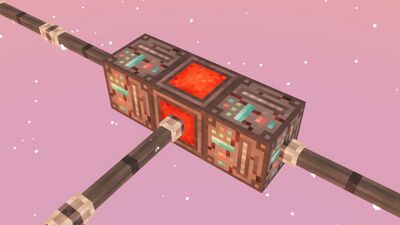
Luckily, the solution to this problem can often be fixed by simply inputting power through opposite sides of the Redstone Block, like so:
Buffering[edit | edit source]
Buffering is the act of using power cells or other power-storing multiblocks along a wire to serve as a checkpoint for the power as it flows from point A to B.
Buffers can also, at times, output at a larger flow rate (power/sec) than the initial power source (like Solar Panels or Generators).
Because extractors (crafting tables) cap at a maximum of 1000 power/sec, buffers are often used in tandem with power banks to increase that number greatly. And power banks, by nature, have two crafting tables. So they’re limited to extracting a maximum of 2000 power/sec by default.
So let’s send each of these outputs to a Power Cell.
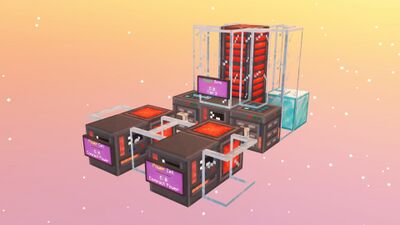
Because the note block has 2 open faces, we can attach 2 extractors to each power cell, and then combine them for a theoretical net total of 4000 power/sec.
DISCLAIMER
Due to technical limitations, the maximum power/sec you can extract from 1 note block is around 3000 power/sec. This is likely a technical bug.
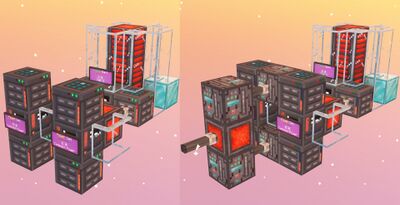
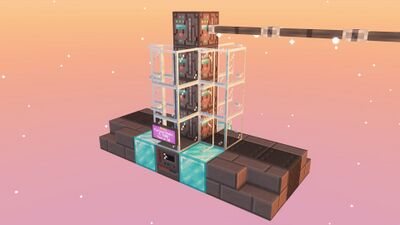
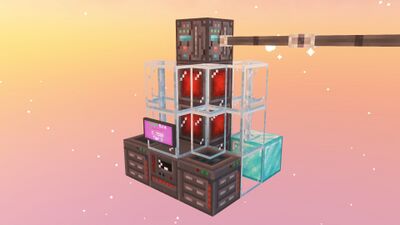
A Decomposer, interestingly, can be used as a 3000 power/sec buffer all on its own due to the openness of its note block, but this is used much less often because it’s less well-known.
If we position the decomposer like this, and then put 4 extractors on the note block:
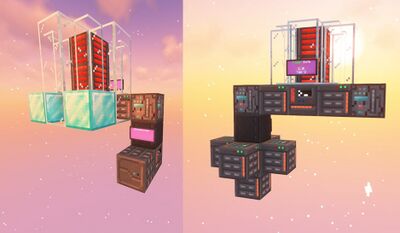
Then we'll merge all four of these outputs.
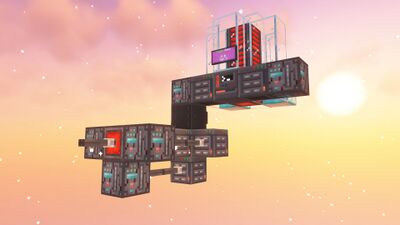
Then when we apply this to both sides and merge the outputs, we can extract 8000 power/sec from the power bank!
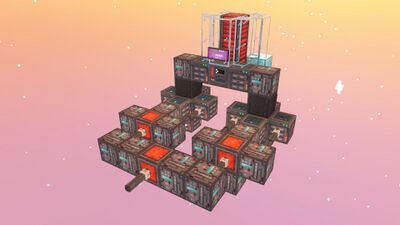
But it’s important to note that if your buffer outputs power faster than it’s filled, there’s a chance that it’ll run empty, and be limited to its input rate.
In this example, the decomposer outputs 4000 power/sec but only receives 1000 power/sec.
Buffers also work as an addition to the total amount of storage your power system has. It’s always good to have some backup power, in case you’re repairing or changing your main power source.
And due to the wackiness of wiring and the occasional jankiness of the server tickrate, it’s a good way to keep your circuits stable!
For buffers, you only realistically have a few options:
Power cells, which can hold up to 50,000 power and extract up to 2000 power/sec. Decomposers, which can hold up to 75,000 power and extract up to 4000 power/sec. All power banks can extract 2000 power/sec.
Alternate Multiblock Powering Methods[edit | edit source]
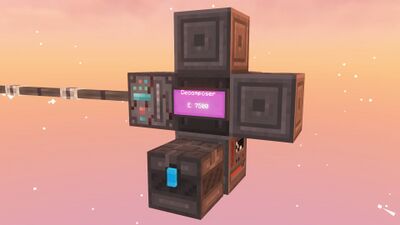
This is regarding methods of powering multiblocks that are different than the intentional way (directly through the note block).
Decomposer
(You can input power anywhere on the iron block, if you want to remove the chiseled blocks and use it as a buffer)
All Printers & Carbon Processors
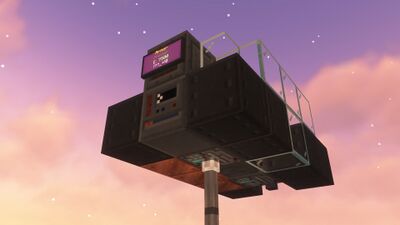
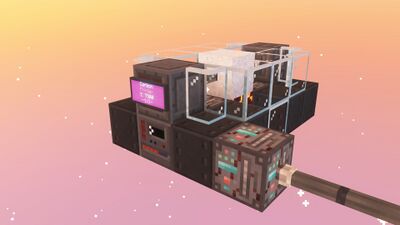
Area Shield
(While this is possible, running power through multiple sponges at once slows down the flow rate)
